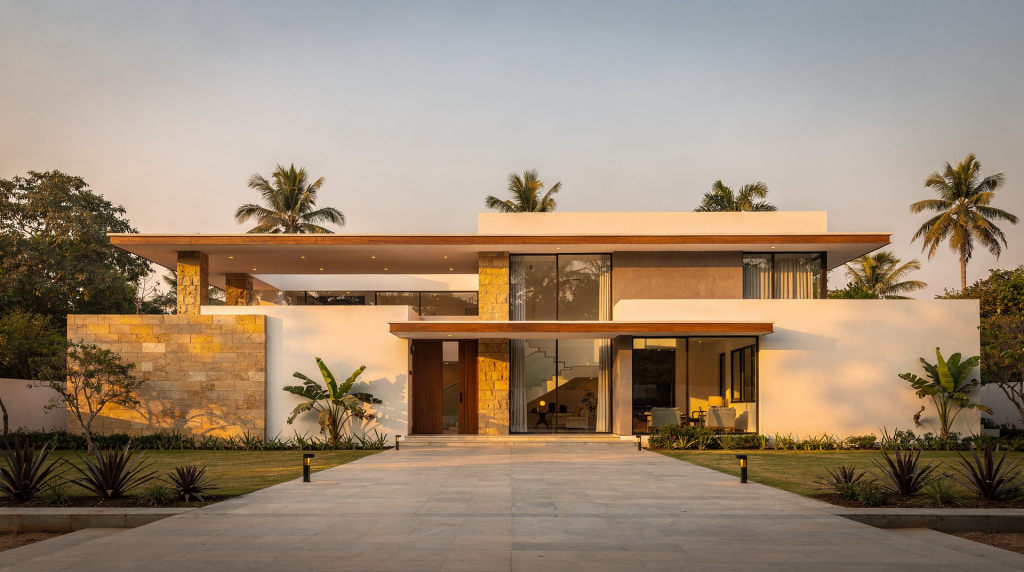
Buying or building a home in India puts your money, time, and peace of mind on the line. What separates a property that holds its value from one that becomes a silent drain on your finances almost always comes down to construction quality. My portfolio isn’t a glossy gallery of finished rooms — it’s a field manual for what a properly planned, executed, and handed-over home actually looks like behind the paint. Every project included is meant to show you the difference between surface-level appeal and genuine, inspectable quality.
Why our portfolio matters
A custom home has to survive monsoons, peak summer heat, daily use by an active family, and years of settlement — it can’t just look impressive on handover day. In India, the same architectural plan can turn into a durable asset or a maintenance nightmare depending on how it was built. Climate zones vary from coastal humidity to dry extreme heat, soil conditions shift dramatically across even a single district, and the skill level of site labour can make or break a waterproofing detail. That’s why the construction approach matters as much as the design, and why a portfolio should be read like a construction audit, not an interior design magazine.
In my portfolio, I’ve organized everything around one straightforward idea: let the work speak through the stages that are hardest to fake. That means you’ll find evidence of:
- clear structural planning tied to a specific site and soil report
- durable materials chosen to handle Indian heat, rain, and humidity instead of just looking good on a brochure
- careful waterproofing and moisture control that starts below ground and continues through every terrace and wet area
- clean detailing in finishing work — joints, levels, reveals — not decorative excess
- practical layouts that account for cross-ventilation, storage, and how a family actually moves through its day
- quality checks at every hold point, not a rushed cosmetic inspection a day before possession
What you should expect from a custom home portfolio
A genuinely useful custom home portfolio should give you the confidence to judge a builder’s work beyond aesthetics. It should reveal how the builder handles the parts of a home that are expensive to repair and impossible to hide if done badly. When I evaluate a project — or when I show one — I focus on three areas that tell you almost everything you need to know.
1. Site planning and layout logic
Good construction begins with how the house sits on its plot, not with the first brick. A thoughtfully planned home considers:
- plot size, shape, and orientation relative to the sun path and prevailing winds
- natural light intake and cross-ventilation to reduce dependence on artificial cooling
- privacy between rooms and from neighbouring buildings — especially in dense urban plots
- access for cars, service personnel, utility connections, and future maintenance
- room dimensions that feel genuinely usable after furniture is placed, not merely generous on a floor plan
When I walk through a well-planned home, it often feels calm and efficient because the circulation works naturally. Hallways aren’t dark leftover strips; kitchens have logical work triangles and connection to a utility area; each bedroom has usable wardrobe space and a window placed to catch morning light or evening breeze. These aren’t luxuries — they’re the result of disciplined planning that directly reduces long-term running costs and daily friction.
2. Structural discipline
The structural frame is the skeleton you’ll never see after plaster and paint go on, which makes it the single most important system to verify early — either through progress inspection or thorough documentation. A high-quality build will show a consistent, engineer-designed structural system that matches the soil conditions and seismic zone. Look for evidence of:
- proper foundation depth and type confirmed by a soil test, not just a guess
- correctly executed RCC frame with clean formwork and properly placed reinforcement
- slabs and beams that follow the structural drawings without ad-hoc adjustments
- load paths that align with the architectural layout — no columns omitted to save money
- attention to local soil factors like black cotton soil expansion or high water tables
If the skeleton is weak — rebar spaced incorrectly, concrete poorly compacted, or foundations undersized — no amount of Italian marble or designer lighting will make that home a safe investment. I’ve seen buildings develop diagonal cracks within two years because the frame wasn’t designed for the soil movement, and by then repairs require intrusive, expensive retrofitting.
3. Material selection
The materials a builder chooses tell you how they balance short-term margin against your long-term ownership costs. A responsible construction approach means using verified materials that can be traced back to a standard, not just whichever option gives the highest discount at the local yard. Concrete examples I insist on include:
- steel from primary producers with test certificates, not re-rolled TMT bars of uncertain quality
- fresh cement within its shelf life and stored correctly on site
- consistent masonry blocks or bricks with uniform strength and water absorption
- plumbing lines and fittings that meet IS standards — CPVC or composite pipes rather than low-grade PVC that becomes brittle
- electrical components built for the actual load and surge conditions, with proper earthing
- external finishes that resist fungal growth, saltpeter, and UV degradation
- waterproofing systems that include integral compounds, polymer-modified screeds, and detailed treatment around pipe penetrations
The point is never about choosing the most expensive product; it’s about mechanical reliability and service life. A pipe that leaks behind a tiled wall costs multiples of the initial material saving when it has to be chased out and replaced.
Our construction approach
My approach to building a custom home is methodical and deliberately redundant on the side of caution — I’d rather spend extra time on a wet area treatment than field a call about damp patches six months after possession. The goal is to produce homes that stay sound, feel good to live in, and don’t carry hidden liabilities for the owner. Every project moves through four stages that build on each other, and shortcuts in any one of them nearly always surface later as a defect.
Step 1: Pre-construction planning
Before the first excavation, I invest significant effort in design coordination and risk identification. This phase covers:
- detailed discussions about how the family lives — not just room counts, but daily routines, storage needs, ageing-in-place considerations, and future flexibility
- a thorough site analysis: soil bearing capacity, water table level, drainage pattern, neighbouring structures, and tree roots that might affect foundations
- alignment of the architectural layout with the structural grid and service routes so that columns, beams, pipes, and ducts coexist without awkward clashes
- early identification of likely construction challenges — poor vehicular access for concrete pumps, restricted working hours in a narrow street, monsoon timing
- a cost plan that sequences cash flow and builds in realistic contingencies, so the project doesn’t stall midway
Many expensive defects are born at this stage. A bathroom stacked incorrectly across two different structural zones, a staircase that blocks natural light, a terrace detail that doesn’t allow for thermal movement — these are planning errors that turn into structural cracks or water ingress long after possession. I’ve learned that the cheapest time to fix a problem is on paper.
Step 2: Structural execution
A home must be built from the structure outward — not from the finishes inward. That means the foundation, frame, slabs, and core civil works are treated as the true foundation of the whole project, not rushed to reach the “visible” stage faster. During execution, my teams and I prioritize:
- accurate setting out with total stations and periodic re-checking of gridlines
- proper reinforcement placement with correct cover blocks and chairs — I personally inspect critical beam-column junctions before concreting
- concrete quality control through slump tests, cube casting, and careful batching — not relying on guesswork or extra water to improve workability
- curing discipline: ponding, hessian cloth, or curing compounds applied for the full required period, not just a token sprinkling
- regular alignment and level checks, especially for slabs and staircases
- a mandatory inspection hold point before moving to blockwork or plaster, so any casting errors are caught while they can still be corrected cheaply
When structural work is compressed because the client wants to see progress, the price is paid later in hairline cracks, uneven floors, seepage paths through cold joints, or long-term settlement. A few extra days of curing can prevent a lifetime of patch repairs.
Step 3: Waterproofing and weather protection
In India, waterproofing is not a post-construction remedy; it is a primary structural discipline. Between monsoon lashing, terrace water ponding, constant bathroom use, and the risk of concealed plumbing leaks, a single weak point can channel water through a slab and destroy ceilings, walls, and expensive electrical fixtures. My waterproofing protocol treats every wet area as a potential failure point and includes:
- terraces and roof junctions: graded screed with drip edges, cove detailing at parapets, and reinforced waterproof membranes tested by ponding for at least 48 hours
- bathrooms and kitchens: full surface treatment behind tiles, not just a band at floor level; pipe penetrations sealed with polymer grouts and flange systems
- balconies: slope away from the building, integrated drip grooves, and connection to a properly sized rainwater downpipe
- external walls: waterproof plaster additives and a protective coating system that breathes so trapped moisture doesn’t cause blistering
- service shafts and plumbing ducts: accessible panels and waterproof linings that allow inspection without breaking tiles
A home can have exquisite interiors, but if water finds its way into the slab or wall cavities, mould, corrosion, and peeling paint follow. I’ve seen families vacate a nearly new home because persistent damp ruined the living experience. That’s why I treat waterproofing as a non-negotiable scope with its own inspection checklist.
Step 4: Finishing with restraint and precision
Good finishing is the art of clean execution — not the quantity of expensive materials applied hastily to hide underlying imperfections. When the base work is true, the finishes almost take care of themselves. My standards for finishing include:
- walls that are plumb and flat, checked with a 2-metre straightedge before painting
- tile work with consistent joint widths, full bedding, and no hollow sounds when tapped — using levelling spacers and laser alignment
- neat joinery: doors that swing without scraping, windows that seal tightly, hardware aligned and securely fixed
- paint applied in controlled coats with thorough surface preparation, not sprayed thinly to mask plaster cracks
- solid door and window installation with proper packing, square frames, and weather-stripping
- reliable plumbing and electrical fit-off with no leaks, correct pressure, and panel labelling that actually matches circuits
Visible finishing defects — crooked tile lines, wavy plaster, gaps around frames — are often the symptom of earlier shortcuts. Straight lines, level surfaces, and crisp junctions are signs that the whole construction process was controlled from the start. This is what I look for in my own team’s output, and it’s what a buyer should learn to read as a proxy for hidden quality.
Common construction mistakes we avoid
Over the years, I’ve seen a pattern of recurring failures in homes across India — many of them look acceptable during a quick walkthrough but start to reveal their seams within the first two monsoon cycles. The table below lists the mistakes I’ve learned to eliminate from my projects completely, along with the reasoning and the better approach that makes the difference.
| Common mistake | Why it becomes a problem | Better approach |
|---|---|---|
| Weak waterproofing | Leads to seepage, dampness, blistering paint, and hidden rust in reinforcement. In coastal or high-rainfall zones, this can cause structural degradation within a few years. | Treat waterproofing as a core construction scope from the foundation level upward, with dedicated supervision and ponding tests before finishing. |
| Poor site supervision | Creates uneven workmanship, misaligned columns, honeycombing in concrete, and defects that are covered over before anyone notices. | Keep scheduled inspections at every hold point — rebar, formwork, concreting, plaster, waterproofing — and document them with photos. |
| Cheap materials in hidden areas | Causes failures in concealed conduits, internal plumbing, and structural elements that are dramatically more expensive to repair once walls are closed. | Use verified materials throughout the build, even where they won’t be visible. The cost difference is marginal compared to a future tear-out. |
| Bad ventilation planning | Makes rooms hot, humid, or stale; increases air-conditioning load and can trap cooking fumes and moisture, leading to mould and paint damage. | Plan window sizes, opening directions, and airflow paths early, using climate data and wind rose diagrams for the specific site. |
| Rushed finishing | Produces plaster cracks, tile hollow spots, and misaligned joinery that require rework or permanent dissatisfaction. Often done to meet an artificial handover deadline. | Proceed to finishing only after all substrate checks are signed off. Built-in drying and curing time saves costly rework. |
| Ignoring maintenance access | Makes future repairs hazardous and disruptive — cutting into walls or ceilings to fix a leaking pipe that was buried without an inspection hatch. | Design in practical access panels, service ducts, and reachable shut-off valves. It adds negligible cost and saves enormous future expense. |
| Undersized or badly graded terrace drains | Leads to water ponding on the roof, which accelerates waterproofing fatigue and eventually causes leaks directly above bedrooms or living areas. | Calculate rainfall intensity for the location, size the drains and outlets accordingly, and include a secondary overflow path. |
What makes a home worth buying or building
A strong portfolio should help you evaluate true value, not just the asking price. In the Indian market, buyers often compare homes solely on cost per square foot, but the real cost of ownership includes the repairs, repainting, plumbing fixes, and air-conditioning bills that accumulate when the original construction was compromised. I’ve seen a seemingly cheaper home become more expensive within five years than one that cost 15% more upfront but was built with discipline.
A home is usually worth serious consideration when it offers:
- sound construction that leaves a paper trail — structural drawings, cube test reports, waterproofing inspection records
- a layout that supports daily life without forcing compromises: groceries can come in without crossing the living room, dinner smells don’t linger in bedrooms
- materials chosen to endure local conditions — termite-resistant door frames, non-corrosive plumbing in saline groundwater areas, facade materials that don’t need repainting every two years
- water management that protects the structure from the very first rain, with details you can test during a site visit with a simple water spray or by checking drainage slopes
- reasonable maintenance needs: surfaces that clean easily, access points that don’t require breaking tiles, hardware that stays functional without constant adjustment
- thoughtful design that favours proportion, light, and comfort over decorative excess that dates quickly
In short, a good home should feel calm, solid, and easy to live in day after day — not just photograph well for a social media post.
How to evaluate a finished home against a builder’s portfolio
When you’re comparing a portfolio with an actual home — either a completed project or one under construction — use the portfolio as a quality checklist, not a mood board. Walk through with a critical eye and a few simple tools.
Look for these signals
- Are corners, tile lines, and reveals aligned cleanly? Use a small spirit level or laser on horizontal joints — deviations over a few millimetres suggest rushed work.
- Do the walls show any signs of damp patches, salt efflorescence, or touch-up paint that could hide seepage? Pay special attention to external walls and ceiling corners.
- Are windows and doors fitted with uniform gaps, smooth operation, and no light leakage around frames? Lift a sash and feel for play.
- Is the terrace sloped toward drains with no backfall? Pour a bottle of water and watch if it flows freely or puddles.
- Are bathrooms and balconies detailed with visible waterproofing logic: cove joints, proper drain flanges, and no cracks at tile-to-floor junctions? Look under the sink for signs of past leakage.
- Does the home feel naturally ventilated and bright without switching on artificial lights? Try to visit at mid-morning when light angles reveal the true balance.
- Are service areas — wash areas, ducts, electrical panels — actually practical, with enough clearance to operate and service, or are they squeezed behind doors that barely open?
Ask these questions
Go beyond polite conversation and ask the builder direct technical questions. A builder who can answer them clearly and provide evidence usually understands construction beyond marketing points.
- What structural system was used, and may I see the structural drawings and soil test report?
- How was waterproofing handled on the terrace and in wet areas — what products were used and were ponding tests done?
- What material standards were specified for steel, cement, and plumbing? Can you share batch test certificates or purchase records?
- How were quality checks documented — do you have dated photographs of reinforcement, shuttering, and concrete pours?
- What happens if defects appear after handover? Is there a structured defect liability period and written process for rectification?
- How is the builder managing site supervision? Is there a full-time qualified engineer on site, and how often does a senior supervisor inspect?
I’ve encountered plenty of developers who become vague when these questions arise; that vagueness is itself an answer. A quality-focused builder will have detailed records and won’t hesitate to walk you through them.
Why our approach suits Indian buyers
Indian homebuyers operate in a unique environment: a rapidly urbanizing market with enormous variation in construction standards, climatic stress from intense heat and monsoon, and regulatory frameworks that haven’t always caught up with enforcement. You’re often asked to make a life-defining financial decision based on a brochure and a single site visit, with very little technical information to back it up. That lack of transparency is what my approach tackles head-on.
I’ve designed my construction and evaluation process around clarity and practical scrutiny because I know how easily buyers can be overwhelmed. When you’re looking at a property, you should be able to see past the staging and check the things that truly determine durability — the foundation type, the waterproofing strategy, the choice of pipe material, the ventilation logic. This is especially critical for custom homes, where design freedom also means a higher responsibility to get the technical details right, because a badly detailed custom feature can become an expensive maintenance liability. Whether you’re buying a ready home or building from scratch, I want you to know what to verify, where hidden risks usually sit, and why a home that costs slightly more on day one might cost dramatically less over the next twenty years.
Checklist: what a strong custom home project should deliver
- a well-considered layout with logical room relationships and movement paths
- strong structural planning backed by soil data and engineering calculations
- verified materials with traceable test reports, not just supplier assurances
- proper waterproofing treated as a primary scope with documented testing
- careful site supervision at every construction stage, not just cosmetic finishing
- clean, precise finishing that reflects controlled substrate preparation
- practical ventilation and natural daylight throughout the living spaces
- easy maintenance access to plumbing, drainage, and electrical points
- fewer defects at handover, and a clear process for those that do appear
- long-term comfort, lower running costs, and structural peace of mind — not just immediate visual appeal
Final thought
I’ve learned through thousands of site hours that a custom home should feel like a wise decision years after possession, not just a thrill on handover day. That’s the standard I hold my portfolio and construction approach to: build with structural discipline, check the details at every hold point, and put long-term quality ahead of short-term decoration. When a home is built this way, it protects your investment and your family’s daily experience — and that’s exactly what you should be able to demand.
FAQ
What should I look for in a custom home portfolio?
Focus on the evidence a portfolio provides about structure, waterproofing, layout logic, material grades, and finishing consistency. Attractive interior photos are meaningless unless supported by process documentation — ask to see photos of the frame, the waterproofing stage, and the terrace before tile work. A trustworthy builder will have them ready.
Why is waterproofing so important in India?
Because the combination of monsoon rains, high humidity, and hidden plumbing runs creates constant moisture stress on a building envelope. Weak waterproofing allows water to seep into slabs and walls, causing blistering paint, rusted reinforcement, and eventually structural degradation. In many Indian coastal and high-rainfall zones, waterproofing failure is the single most common cause of premature home deterioration.
Is a new home always better than an older one?
Absolutely not. A newly constructed home can hide poor workmanship behind fresh paint, while an older home that has survived several monsoon cycles without seepage or cracks may actually be far better built. The real measure is whether the construction quality is sound and independently verifiable — through inspection records, material certificates, and physical checks — regardless of age.
What is the biggest mistake buyers make?
Judging a home mainly by appearance or price per square foot, without inspecting the build quality, drainage, ventilation, and long-term maintenance liabilities. I’ve seen buyers overlook a clearly damp wall because the kitchen had imported tiles, only to spend lakhs later on mould removal and structural repairs.
How can I tell if a builder is quality-focused?
A quality-focused builder can and will explain the structural system in detail, cite the materials used with verifiable standards, describe the quality check schedule, and outline the defect-handling process without hesitation. If answers are vague or you’re told “don’t worry, it’s all good,” it’s a signal to dig deeper or walk away.