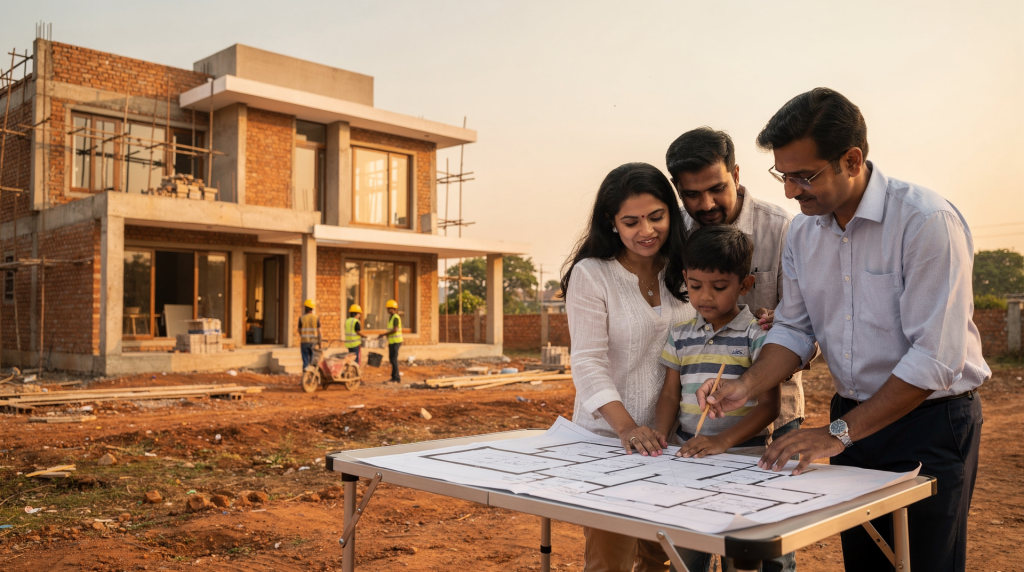
Planning a custom family home isn’t about sketching a pretty elevation and hoping for the best. It’s a disciplined process—hundreds of decisions stacked in the right order. Get the sequence right, and you end up with a house that fits your family’s routine, your plot’s quirks, and your budget without constant compromises. Get it wrong, and you’re dealing with delays, rework, and costs you never saw coming.
For families in India, where summer heat, monsoon rains, and city‑specific building rules set hard limits, you need a system: site analysis, design, structure, services, finishes, and maintenance all woven together. I’ve spent over 15 years designing and building homes, and I’ve seen too many projects drift because someone treated the house as a collection of rooms rather than an integrated system. Let’s walk through how we do it—so you can avoid the costly mistakes and build a home that’s safe, comfortable, and genuinely worth the investment.
Why custom home planning matters
A custom home is not a scaled‑up version of a developer’s standard floor plan. It’s a one‑off structure shaped around your family’s habits and a specific piece of land. That uniqueness gives you enormous control—you decide how the house breathes, where the light falls, how much storage is built in, and how private each space feels. But control without a clear process becomes a liability. When decisions are made in isolation, the project drifts. You end up with oversized living rooms that look grand but waste square footage, bedrooms that trap heat, or plumbing and electrical lines that get shifted after the walls are up—adding weeks of rework and burning cash.
A solid plan from day one helps you avoid:
- Oversized rooms that look impressive on paper but waste usable space
- Poor ventilation that makes the house hot and damp
- Structural layouts that force awkward room placement later
- Electrical and plumbing changes after construction has started
- Cost overruns caused by mid‑project design changes
- Finishes that look good initially but fail under daily family use
Start with the family, not the facade
Before anyone sketches an elevation or selects tile samples, you need to map out how your household actually functions. I always start with a series of questions that look beyond today—because a house that works for a young couple might fail miserably when they have a toddler or aging parents. Think about who will live here, how they spend their days, and what flexibility you’ll need five to ten years down the line. These aren’t abstract musings; they directly shape room sizes, adjacency, and even structural decisions like whether the master bedroom goes on the ground floor.
Ask these questions first:
- How many people will live in the house now, and in 5 to 10 years?
- Will parents, children, or elderly family members need separate zones?
- Do you work from home and need a quiet room?
- Do you entertain guests often?
- Do you need space for study, prayer, utility work, or staff?
- Do you want a house that is easy to maintain, or one with more architectural detail?
This stage matters because layout decisions are hard to change later. A family that needs ground‑floor living for ageing parents should not treat that as a secondary concern. A family that cooks heavily every day needs a kitchen design that supports storage, ventilation, and cleaning. I’ve seen families with elderly parents build a beautiful home only to realize the staircase is too steep and the ground floor has no bedroom—forcing a costly retrofitted lift or a painful relocation. That’s the kind of mistake your brief should prevent.
Step 1: Study the plot properly
A house that fights its plot will never feel right. Before I draw a single line, I spend time on the site—not just measuring dimensions, but observing how water moves during a downpour, which walls get baked by the afternoon sun, where the prevailing wind comes from, and what the neighbour’s future extension might do to your privacy. In India, orientation is critical. A west‑facing wall without shading can turn a bedroom into an oven during May. A slight depression in the land can lead to flooding during the monsoon if not properly addressed. The plot study isn’t a formality; it’s the foundation of every smart design decision.
Key things to check:
- Plot dimensions and shape
- Road access and setback rules
- North/south/east/west orientation
- Slope, drainage, and soil conditions
- Neighboring buildings and privacy impacts
- Noise, dust, and traffic exposure
- Sun path and prevailing wind direction
Plot checklist
- Confirm the exact site measurements (never trust the sale deed dimensions alone—physically measure and cross‑check with revenue records)
- Identify any easements or access issues that could limit where you build
- Check where rainwater will flow during monsoon—look for natural drainage paths and figure out if you need to raise the plinth or create a swale
- Note shading from nearby buildings; it affects natural light and can dictate where you place windows
- Observe noise levels at different times of day—a quiet afternoon plot might become a market route during morning rush
- Understand local building rules (setbacks, floor area ratio, height limits) before finalizing the design—otherwise you’ll be revising drawings later
Step 2: Convert needs into a practical brief
A design brief is a simple document, but it’s the single most powerful tool you have to keep your architect, structural engineer, and builder aligned. It translates your lifestyle into measurable requirements: number of bedrooms, type of kitchen, storage volumes, parking slots, and even the level of maintenance you’re willing to tolerate. Instead of saying “I want a premium home,” define what premium means for you. For one family, it’s a large, well‑ventilated kitchen that can handle daily cooking without heating up the house; for another, it’s durable flooring that survives kids and pets; for a third, it’s a quiet home office with its own entrance.
A strong brief should include:
- Number of bedrooms and bathrooms
- Type of kitchen and utility space needed
- Living and dining arrangement
- Parking requirements
- Storage needs
- Home office or study requirements
- Guest space
- Future expansion possibilities (a ground‑floor column designed for an extra storey costs a little now but saves a fortune later)
- Budget range
- Preferred maintenance level
Step 3: Design the layout around circulation
The best floor plans are the ones where movement feels effortless. You shouldn’t have to walk through a bedroom to reach the dining table, nor should the guest toilet be so deeply buried that visitors get lost. Circulation is the invisible skeleton of the house. Start by zoning: private areas (bedrooms, studies) away from the main entrance, common areas that flow from living to dining to kitchen, and service zones that are tucked near the utility.
A well‑planned layout usually considers:
- Privacy from the entrance to bedrooms
- Short, direct movement from kitchen to dining area
- Separate guest and family zones where possible
- Easy access to bathrooms without awkward corridor dead ends
- Utility spaces that are near the kitchen and service areas
- Stair placement that does not dominate the entire ground floor—in narrow Indian plots, a poorly placed stair can eat up 100 square feet or more of precious space
Common layout mistakes
- Putting the living room directly in line with the front door, so anyone entering sees everything at once—compromising privacy
- Creating a kitchen with no cross‑ventilation, forcing heat and smells into adjacent rooms
- Making bedrooms too narrow to fit a queen‑sized bed and a wardrobe without blocking movement
- Pushing bathrooms into dark corners with no natural light or ventilation duct, leading to dampness and mould
- Designing a staircase that dominates the entire ground floor, leaving awkward leftover spaces
- Ignoring built‑in storage until the end, then relying on bulky wardrobes that shrink the room
A layout error is structural—it can’t be fixed with paint.
Step 4: Plan the structure before the finishes
In my experience, most delays and budget blowouts come from changing finishes mid‑project. But the truly expensive mistakes are the ones you can’t see—the structural shortcuts that turn into cracks, leaks, or sagging slabs years later. Before anyone picks tile colours, the structural design must be locked: foundation type (isolated footings, raft, or pile depending on soil report), column grid, beam depths, slab thickness, and waterproofing strategy.
RCC work in India’s climate demands proper curing—I can’t overstate this. A slab that isn’t cured for at least 10–14 days in hot weather will develop micro‑cracks that weaken its long‑term strength. The same goes for reinforcement: inadequate cover or poorly placed rebar leads to corrosion and spalling, especially in coastal areas. The structural engineer’s drawings are not a suggestion; they are the minimum standard that keeps your family safe.
The main structural decisions include:
- Foundation type
- Column and beam layout
- Slab spans
- Stair structure
- Roof design
- Wall thickness and load‑bearing strategy
Structural priorities to protect
- Safe foundation design for the soil type—soil testing is not optional
- Proper reinforcement in beams and slabs with correct cover and lap lengths
- Clear load paths from roof to foundation
- Adequate slab thickness and continuous curing
- Waterproofing in bathrooms, terraces, and wet areas—detailing at slab junctions, pipe penetrations, and wall‑floor joints
- Monsoon protection at external edges and junctions—water bars, drip courses, and plinth elevation
If a builder suggests reducing structural quality to save money, that is not a saving. It is a future repair bill that will cost many times more.
Step 5: Make the house comfortable in Indian conditions
India’s climate varies from dry desert heat to humid coastal weather and heavy monsoon, but certain principles hold everywhere: your house should stay cooler without burning electricity, stay dry during downpours, and resist dust and insects. The design must work with the climate, not against it. Start with passive strategies: orient the building so that living spaces get north or south light (gentle, diffuse), while service areas and storerooms shield the western and eastern ends. Use deep balconies or pergolas to shade windows. Ensure every habitable room has at least two openings on different walls to encourage cross‑ventilation—even a small vent above a door helps. In high‑humidity zones, avoid materials that absorb moisture; in dusty regions, design for easy cleaning. Monsoon‑readiness means raising the plinth above the street level, detailing the roof drainage to handle a heavy downpour, and waterproofing the ground‑floor walls against rising damp. Don’t rely solely on air conditioning; the grid isn’t always reliable, and your electricity bills will punish a poorly insulated house.
Practical climate considerations
- Use shading on harsh sun‑facing sides—overhangs, pergolas, or deep balconies
- Keep cross‑ventilation in living spaces and bedrooms; avoid single‑aspect rooms
- Avoid sealed, dark rooms that trap heat and moisture
- Specify waterproofing carefully in bathrooms, balconies, and terraces—include ponding tests
- Raise the plinth where flooding or runoff is a risk—at least 450–600 mm above the road level
- Choose finishes that tolerate dust and frequent cleaning
- Plan for mosquito screens and insect control if needed—retro‑fitting is messy
Materials and finishes that work well in daily life
A family home should balance appearance with durability. High‑maintenance surfaces often become a burden after the first year.
| Area | Better practical choice | Why it works |
|---|---|---|
| Floors | Durable tiles, stone, or quality vitrified options | Easy to clean and suitable for heavy use; vitrified tiles resist moisture and stains better than natural stone in many cases |
| Kitchen counters | Stain‑resistant and heat‑tolerant surfaces (e.g., granite, quartz composite) | Handles cooking activity better without etching or burning |
| Bathroom walls | Waterproof, easy‑clean finishes (ceramic tiles with epoxy grout) | Reduces maintenance and seepage issues behind tiles |
| Exterior walls | Weather‑resistant coatings (textured, breathable paints or stone cladding) | Better protection against rain and sun; breathable coatings reduce trapped moisture |
| Stair treads | Anti‑slip finish (natural stone with bush‑hammered surface or grooved tiles) | Safer for children and older family members, especially in homes with polished floors |
Step 6: Coordinate electrical, plumbing, and storage early
Once the walls are up and plastered, moving a switchboard or an outlet means chasing conduits, patching plaster, and repainting—costing money and time. I always freeze the electrical and plumbing layouts before the slab is cast for the ground floor. Walk through each room mentally (or with the plan) and mark where you’ll need a socket for the vacuum cleaner, a charging point by the bedside, a data cable for the home office, a point for the geyser, the water purifier, the fridge, the washing machine, and even a future EV charger. In Indian homes, overhead tank location and water pump placement also need early thought—getting the pressure right for both ground and upper floors often means planning for a booster pump and proper pipe sizing.
Plumbing runs should be as short and straight as possible to avoid pressure drops and leakage points. Don’t forget external taps for car washing and gardening, and drain outlets at the right spots. And storage: built‑in wardrobes, lofts, and utility cabinets that are planned as part of the shell look far better and save space compared to freestanding furniture added later.
Smart service planning checklist
- Place switches where they are reachable without awkward movement—consider furniture layout
- Separate heavy‑load circuits where required (geyser, AC, kitchen hob, iron box)
- Keep plumbing runs short where possible—minimize joins inside walls
- Leave inspection access for critical systems (water tank, sump, main valves)
- Add outdoor taps and drainage where useful—balconies, utility yard, terrace
- Avoid placing electrical points in splash‑prone areas without IP‑rated enclosures
Step 7: Build the budget with buffers
I’ve seen too many families start a custom home with a vague number like “around Rs 50 lakhs” and end up spending 80 lakhs because they didn’t break down the costs. A realistic budget has to be itemized, covering every layer of the build. In India, the biggest unknowns are usually the cost of deep foundations (if the soil is soft), waterproofing (if the area is flood‑prone), and finishing (if you keep upgrading after seeing a neighbour’s house). Always include a 10–15% contingency for design changes, material price hikes, and unforeseen site conditions like rock during excavation. Without that buffer, any small surprise will either stall the project or force you to compromise on something essential.
Budget categories should include:
- Land‑related costs, if not already owned
- Design and consultant fees (architect, structural engineer)
- Approvals and permissions (building plan sanction, NOCs)
- Foundation and structure (concrete, steel, labour)
- Plumbing and electrical work
- Waterproofing (a separate line item, not lumped into “miscellaneous”)
- Flooring and wall finishes
- Windows and doors (frame, shutter, hardware)
- Kitchen and wardrobes (carcass, shutters, hardware)
- External works and boundary treatment
- Landscaping and drainage
- Contingency reserve (at least 10%)
Get your builder to give you a detailed BOQ (bill of quantities) rather than a lump‑sum quote. It’s the only way to track where your money is going.
Step 8: Manage the build in clear stages
Building a house isn’t a linear assembly line, but you can drastically reduce rework by following a disciplined sequence. Each stage should be inspected and signed off before the next begins—if you pour a slab before the plumbing inlets are positioned, you’re already in trouble. After finishing work, I always insist on a thorough de‑snagging before handover—check every tap, switch, door, window, and drain. A week of fixing now saves years of annoyance.
Typical sequence
- Finalize the brief and budget
- Confirm the plot details and approvals
- Complete architectural and structural drawings
- Freeze electrical and plumbing layouts
- Start foundation and structural work
- Complete masonry and slab work
- Install services
- Apply waterproofing and testing (ponding test mandatory)
- Finish flooring, painting, and fixtures
- Inspect, rectify, and hand over
Quality checks during construction
You don’t need a civil engineering degree to catch most problems early. You need a routine: visit the site regularly, at critical stages, with a checklist. The foundation stage is about dimensions and reinforcement—ensure the footing size matches the drawing and that cover blocks are in place. During framing, check that columns are vertical, beam bottoms are level, and shuttering is rigid. Concrete must be vibrated properly and cured. Masonry: check plumb, window/door opening sizes, and proper bonding. Waterproofing: insist on a ponding test on terraces—let water stand for 48 hours and check for leaks below. Electrical and plumbing: pressure test the pipes before closing up; verify switch heights. Finishing: tile lippage (uneven edges) is a clear sign of poor workmanship.
What to check at each stage
- Foundation stage: dimensions, soil handling, reinforcement quality, cover blocks
- Structure stage: beam alignment, slab level, curing process, concrete compaction
- Masonry stage: wall straightness, openings, bonding quality, lintel placement
- Waterproofing stage: slope, sealing, water test results (48‑hour ponding)
- Electrical and plumbing stage: point locations, pressure tests, access, verticality of conduits
- Finishing stage: tile alignment, paint consistency, door fit, drainage slope in bathrooms
Simple signs of poor workmanship
- Cracks appearing too early (within months of construction)—often structural
- Uneven floors or wavy walls—check with a spirit level and straight edge
- Damp patches near terraces or bathrooms—waterproofing failure
- Doors or windows that do not close properly—frame out of plumb
- Visible patchwork in finishes—shoddy work hidden by paint
- Water stagnation around wet areas—incorrect slope or choked drains
- Switches or fittings placed without logic—no coordination with furniture layout
Typical mistakes families make
- Prioritizing appearance over function—spending heavily on imported marble while skimping on waterproofing
- Changing the plan repeatedly during construction—every change order after the structure is up adds 15–20% to the original cost of that work
- Underestimating storage—realizing only after moving in that there’s no place for the vacuum cleaner, suitcases, or festival decorations
- Ignoring future family needs—that home office might become a nursery; flexibility is cheap during design, expensive later
- Choosing finishes before solving the structure—tile choices can be made later, but the beam that blocks a window is permanent
- Hiring too many decision‑makers without one clear lead—design by committee leads to inconsistent compromises
- Accepting vague estimates without itemized scope—an invitation for disputes
- Skipping site visits during critical stages—once the slab is poured, mistakes are sealed in
A custom home runs best when one person or one small decision‑making group keeps the brief consistent. Too many opinions can turn design into confusion.
What makes a custom family home truly successful
A successful custom home isn’t the one with the most expensive Italian marble or the fanciest elevation. It’s the one where the family wakes up comfortable, moves through the day without friction, and doesn’t constantly fight the building. It’s a home that handles summer heat without bankrupting you on electricity, that stays dry during the monsoon, that offers privacy when needed, and that can adapt as the family changes—without major reconstruction. The structure is sound, the systems are robust, and the maintenance burden is manageable. That’s the real benchmark: a house that works as hard as you do.
Final planning checklist
- The layout matches family routines—test it with furniture outlines on the plan
- The plot orientation has been considered—heat gain, light, and wind are part of the design
- Structure and architecture are coordinated—no last‑minute beam under a window
- Services are planned before construction begins—points, conduits, and pipes are marked on drawings
- Wet areas have proper waterproofing details—ponding test scheduled
- Storage is built into the design—even cupboards, loft spaces, and utility cabinets
- The budget includes contingency—at least 10% set aside
- The construction sequence is clearly defined—signed‑off stage completion before moving on
- Quality checks are scheduled for each stage—checklists ready
- The house is designed for Indian climate and daily use—ease of maintenance is a design goal
FAQ
How early should a custom home design start?
Ideally, six to twelve months before you plan to break ground. That gives you time to study the plot, develop a proper brief, engage an architect and structural engineer, and iterate the design without rushing. Starting early also allows you to obtain the necessary approvals—which in India can take several months depending on the local authority—before you commit any construction funds.
What is the most important part of a custom home plan?
The layout. It dictates how you use the house every day: movement, light, ventilation, privacy, and the relationship between spaces. A poorly conceived layout can rarely be fixed later, whereas finishes and even some services can be upgraded over time. Get the layout right, and the rest becomes easier.
Should finishes be chosen before construction starts?
You should define the performance requirements (durability, maintenance, climate suitability) early, but final colour and tile selections can wait until after the structure is up and the budget is firm. Making final finish choices too early often leads to regrets or hasty changes that impact cost. Just ensure that any structural implications (like heavy stone cladding) are decided early.
How do you avoid budget overruns?
Itemize everything. Use a detailed bill of quantities and set a contingency of at least 10% for unforeseen conditions and material price escalation. Freeze the design before construction commences; every change order after that is expensive. Track expenses monthly against the budget, and never make on‑the‑spot decisions at a tile showroom without checking the per‑square‑foot cost against your allocated line item.
Is it worth investing more in structure and waterproofing?
Absolutely. These are the literal backbone and skin of your house. Structural defects are catastrophic and immensely expensive to repair. Waterproofing failures lead to damp, mould, and structural degradation over time. Spending a few extra lacs on better reinforcement, proper curing, and high‑quality waterproofing is a one‑time investment that protects the entire value of your home. Never let a builder cut costs here.
What should be checked on site most often?
Reinforcement details before concreting, concrete mix and placement, curing, plumb and line of walls, waterproofing tests, plumbing pressure tests, and tile/flooring finish. These are the stages where defects get hidden if not caught immediately. Visit at each of these milestones, preferably with your engineer or an independent inspector.
Conclusion
Planning and building a custom family home is essentially about making a long series of decisions in the right sequence, guided by a clear understanding of your family’s needs and the realities of the site. When you treat the process as an integrated system—site, brief, design, structure, services, and quality control—you eliminate most of the chaos and cost overruns that plague custom projects. The result isn’t just a building; it’s a durable, comfortable, and genuinely livable home that will serve your family for decades. And that’s an investment worth making.